6 tools to address envelopes in calligraphy
Once upon a time, when I wanted to address envelopes in calligraphy, I painstakingly calculated and ruled every single one. For copperplate, this included four lines per address line, and slanted 54° guidelines. While an excellent practice for learning good techniques and spacing, it doesn’t scale well on the big jobs.
Address envelopes in calligraphy like a boss
Now when it comes to writing calligraphy on envelopes, I have many tools to help. These are my favourites for both personal and professional work.
Ollie’s Studio envelope template
Lightbox
Laser Level
Reflections Phantom Liner
Ruler + pencil/soapstone
A piece of paper or no tool (aka freestyle)
To work out what’s best for you, you need to consider some key factors. Each tool has benefits but not without compromising something. For me, it’s a matter of considering:
how experienced / confident you are at maintaining script consistency
what script you’re going to use
the material you’re writing on (can you use a lightbox?)
how quickly you need work
whether your envelopes for personal or professional use
For example, I’m fairly confident to calligraph with a laser level for professional jobs or freehand for personal correspondence, but might turn to a lightbox (light envelopes) or phantom liner (dark envelopes) if I want to be exacting in my formal copperplate script. An envelope template is a fantastic middle ground for relaxed formal script, and also lends itself perfectly to modern calligraphy.
1. Ollie’s Studio envelope guideline template
(£14, Ollie’s Studio)
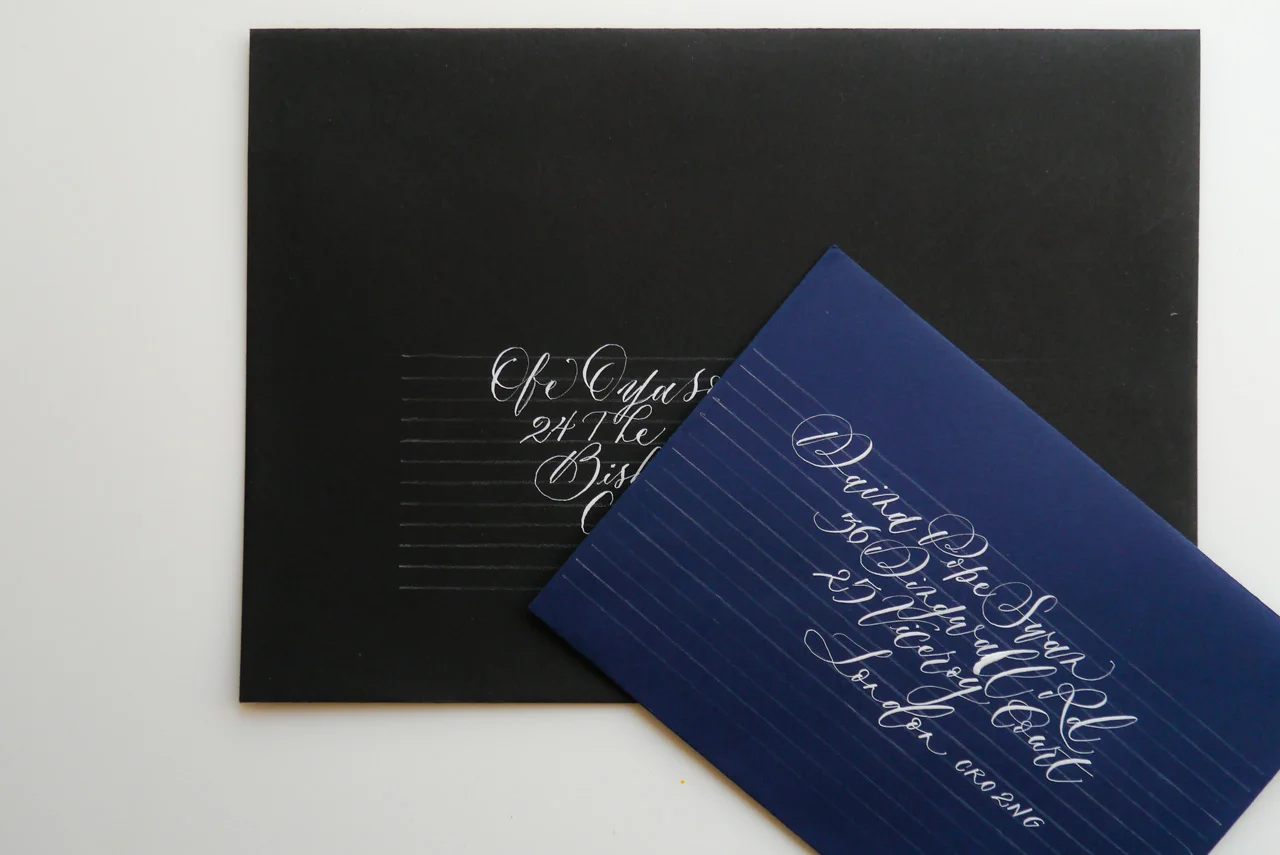
ollie's studio lettering template to address envelopes in calligraphy
Thanks to Ofe at Ollie’s Studio giving me a test drive, an envelope template is now my go-to tool for personal envelope addressing.
I designed this template to quickly create perfectly spaced guidelines and it's cut my envelope addressing time significantly. – Ofe Oyasor, Ollie’s Studio
Tools required:
graphite mechanical pencil of your choice
white fabric pencil of your choice
envelopes (any size)
What is an envelope guideline template?
An envelope template is a stiff shape (Ollie’s Studio’s is a sturdy 3mm acrylic) with spaces cut out where the lines of your address will go. You lay the template over your envelope, use a pencil to mark a line the length of each space, and, voila, you’ve got your address lines. Once you’ve addressed your envelope, you erase your black or white lines (I use an eraser and a soft cloth respectively).
You could make your own template using thick card stock, but having a professionally made tool is so much nicer and more reliable than having bits and pieces of paper flying around the place.
Note: I have always used this soap stone pencil on dark envelopes, but it won't fit through the stencil spaces, which is why I now use the amazingly awesome quilter's pencil.
The pros of a calligraphy envelope template
Grab and go! Place the template where it suits the address layout on your envelope, draw your lines (mark you vertical centre if you’re centre aligning), and write your address. Job done.
It adapts to different envelope sizes I originally thought the template was suited to C6 envelopes, but have since had a bit more sleep and realised that it can be used on many different sizes.
different scripts to address envelopes in calligraphy
You just need to make sure you can line it up consistently at the start (if it’s a professional job) so that your address lines are around the same place on each envelope. But that’s not so hard to do.
It can be used on different coloured envelopes Whether you’re writing on light or dark envelopes, as long as you’re marking up with the right tool, then you can use the template on any envelope.
Create gorgeous envelopes in your own style Assessing it straight off the bat, I thought that the template didn’t cater to the three key lines I work with (ascender, x height, and descender), or to longer (overseas addresses) but Ofe clarified that you can add more lines as you required just by sliding the template down the envelope and drawing more. This gave me more scope to play around with script spacing, and also means I can work with formal copperplate as well as modern calligraphy scripts. I just use about two-thirds of the x-height for copperplate as it would otherwise be a rather bulky 5mm lowercase letter.
using a lettering template to address envelopes in copperplate calligraphy
It’s a kind of meditation Once I got into the rhythm of ruling up my envelopes with the guideline template, I found it oddly soothing.
The cons of a calligraphy envelope template
Because you need to erase the lines, I tend not to use it for large batches of jobs. Writing the calligraphy is slow going so I try to limit any additional work, but love that I can just grab my template and get straight to work without any fuss. It’s worth testing to make sure that what you’re using will easily erase. I had some issues on metallic finish envelopes and the graphite mechanical pencil.
While I had my reservations in initial testing with the template, I’ve had more time to work with it and determine how it best fits into my calligraphy kit. It is now a mainstay on my desk.
2. Lightbox
(approx £70, Amazon.co.uk)
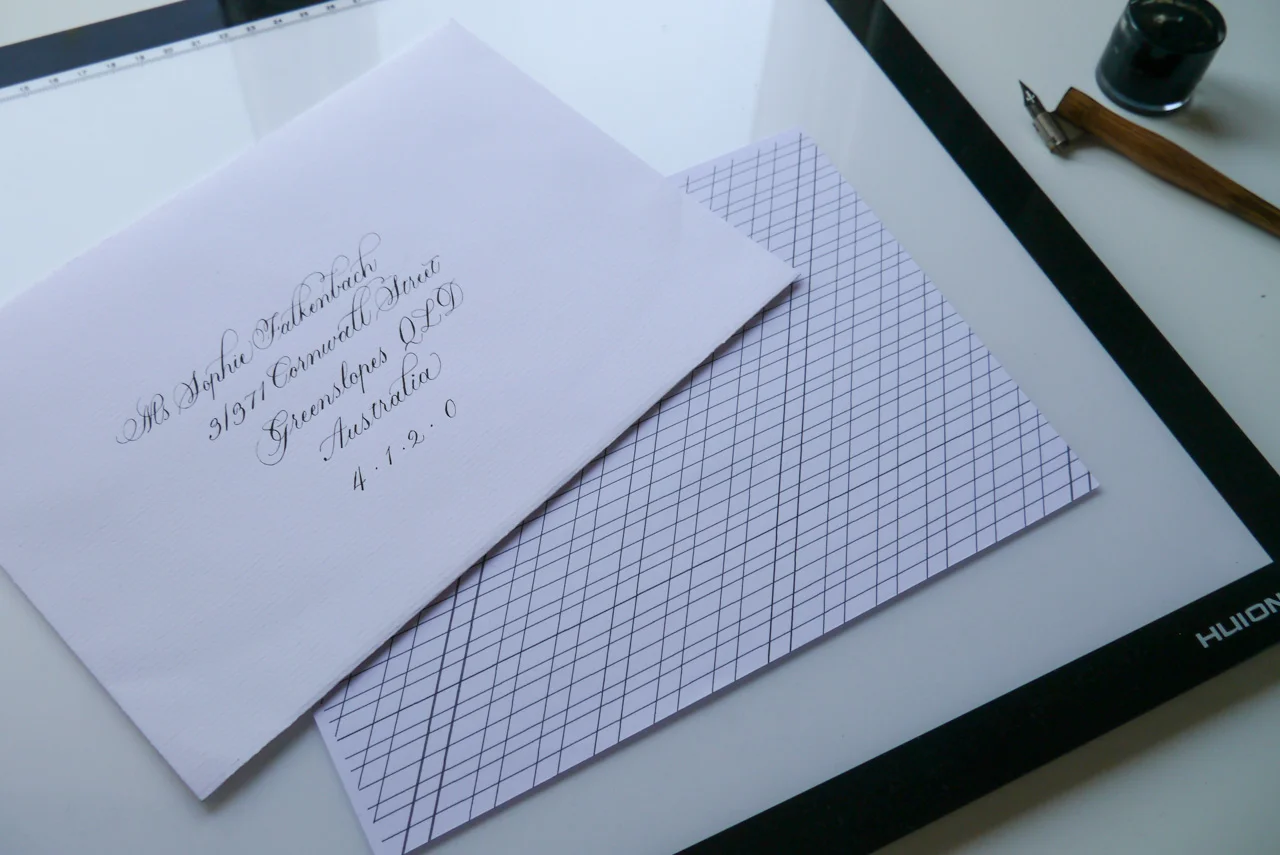
using a lightbox and guidelines to address envelopes in calligraphy
The lightbox has been with me since the very early days of starting Olive & Reid Studio and will always be an essential tool for much of my work. I don’t use it all that much for envelopes, though, as it can be restrictive in terms of ensuring you’re working with light envelopes of just the right thickness (GSM).
Tools required:
lightbox of your choice (I have a Huion A3 Light Box)
address template drawn/printed on paper cut to just smaller than your envelope
envelopes (any size)
The pros of a lightbox for calligraphy on envelopes
Reliable and fuss free As long as you’ve set your guidelines up correctly, and you can see them through your envelope with the lightbox, you can rely on creating consistently spaced and angled addresses in calligraphy.
The cons of a lightbox for calligraphy on envelopes
Specific A lightbox won’t be suitable for all envelopes, and, unless you’re supplying the envelopes you prefer to work with (that work with a lightbox), you will often need to find alternative ways to address them.
Repetition repetition repetition You may not be able to see your guidelines through the double thickness of an envelope, so your only option may be to cut your guidelines to fit inside the envelope, which you move to each new envelope. This will slow your progress a little.
3. Laser level
(approx £20, Amazon.co.uk)
using a laser level to address envelopes in calligraphy
For some reason, I thought that a laser level was going to cause me serious health issues, so I avoided getting one for way too long. Now, I just ensure that I keep the beam away from eyes, and I can put my super duper danger alarm back on the shelf.
Tools required:
Laser level (I have Black & Decker Laser Level and a 90° laser level)
Printed/drawn guideline template to sit under and extend beyond your envelope
Envelopes (any size)
The pros of calligraphing envelopes with a laser level
Super efficient calligraphy A laser level is by far the most efficient way to professionally calligraph envelopes... with one caveat. With just a baseline to follow, a laser level heavily relies on you “getting your eye in” (calligrapher speak for writing consistent letter forms) fairly quickly. I did once use two laser levels for a particularly precarious job (copperplate on curved porcelain), but that would be overkill for envelopes.
Compared to other methods, the setup time for a laser level is minimal and requires no additional intervention as you work (such as moving guidelines from envelope to envelope on a lightbox) or after you’ve finished (such as erasing template guidelines).
To see a master at work, check out Suz Cunningham’s video via Calligraphy Masters to see how she uses a laser tool specifically designed for calligraphy, the laser square and mat.
The cons of calligraphing envelopes with a laser level
The likelihood of inconsistencies That little caveat I mentioned — the one where you need get your eye in. If you don’t, it can mean obvious inconsistencies across a batch of envelopes (which you may be able to live with, depending on your degree of perfectionism), or across a single envelope (which your client may not be able to live with).
Bumping the tool This might just be me, but I’m pretty prone to bumping stuff, so I’m always setting up my laser, bumping my laser, setting up my laser, etc. This is where the laser square and mat would probably make the world of difference (rather than my portable builders’ tool).
4. Phantom Line Lettering Guide
(approx £45 + import taxes, Paper & Ink Arts USA)
using a phantom liner to address envelopes in calligraphy
For creating precise copperplate script on dark or very thick paper, the Phantom Liner has been essential for my work.
Tools required:
Phantom Line Lettering Guide (Reflections)
Guidelines with reversed slant lines
Envelopes (larger sizes may be trickier)
What is a phantom liner?
The liner is an optical instrument, which you can use to reflect guidelines onto your writing surface (paper or otherwise). It comprises three key pieces: a base, the guideline holder (angled on the left), and the reflection plastic (angled on the right) upon which the light shines through.
This YouTube video kinda sorta explains what I mean with that set up, but I found this Paper & Ink Arts blog post from Nan Deluca more detailed and useful.
The pros of using a phantom line lettering guide for envelope calligraphy
Extending your scope The phantom liner can allow you to take on jobs that you might otherwise have to forego. I used it to address Astley Clarke’s AW17 collection invitations — 500 in a weekend — which would have been a logistical impossibility otherwise (unless I were willing to sacrifice letterform quality).
Precision tactics With the exact guidelines reflecting, as though drawn, directly onto your paper, you can be very precise with your script. This is perfect for dark or very thick paper that would otherwise become a very laborious task to rule up to perfect proportions.
The cons of using a phantom line lettering guide for envelope calligraphy
The eyes, the eyes! This tool can really send you cross eyed and cause some headaches. The depth of field can take some getting used to, and confuse where your nib or guidelines are in relation to the paper. You must ensure your set up, including light source, is in the best position to reflect the guidelines.
5. Ruler and pencil
Tools required:
Ruler
Pencil/soapstone/fabric pencil
Printed/drawn guideline template to sit under and extend beyond your envelope
I mentioned at the start of this blog post, that I once spent a lot of time measuring and ruling up individual envelopes. Madness! A very basic upgrade on this would be to place paper with printed guidelines underneath the envelope. You'd use the same method for the laser level and just switch the ruler for the level. The lines should extend out horizontally beyond the envelope, and then you can use your ruler to match up the lines and draw across your envelope. I currently use a standard steel ruler, but I’ve been eyeing off a rolling ruler or parallel glider that Lindsey from The Postman’s Knock mentions in her posts.
This method is still a lot more work than any of the above mentioned techniques, but it certainly has its place in the calligrapher’s toolbox.
6. A piece of paper or no tool at all (aka freestyle)
This is, of course, my favourite tool of all because it is the ultimate fuss-free solution to address envelopes in calligraphy: no ruling up, no erasing, no fancy gizmos. It’s right up my street. But unless you do a lot of loose script envelopes and have a loads of consistency confidence, then I would suggest it’s more for your one-offs and personal communications.
Option 1: freehand
Be confident and prepared to adjust your layout as you go to try and accommodate anything that goes awry.
freehand addressed envelopes monoline calligraphy
Option 2: a piece of paper
If your layout calls for straight lines, simply lay a piece of paper just below where you want to write and parallel to the envelope and you have a non-invasive visual guide to help you. In time, you'll no doubt get better at spacing your lines consistently, but, as per option 1 above, just be willing to adapt as you need to create a balanced address layout.
freehand envelope addressing monoline calligraphy
Share your thoughts about addressing envelopes in calligraphy
I'd love to hear from you about your wild and wonderful ways when it comes to envelope calligraphy. What have I missed? What haven't I explained very clearly? What have I been doing the wrong way? What's your favourite method? Let's chat in the comments section below.
A note about links in this blog post
Some of the links in this post are to Amazon.co.uk, which, as an affiliate means I may earn a small commission if you purchase. I only ever link to products I have purchased or tried, or know from my trusted calligraphy counterparts (in this post, from Lindsey at The Postman's Knock and Suz Cunningham). While it is a small amount of money, it does help to keep me blogging so that I can share tips, supplies and techniques with you. Consider it a donation that you don't have to donate, if you will.


